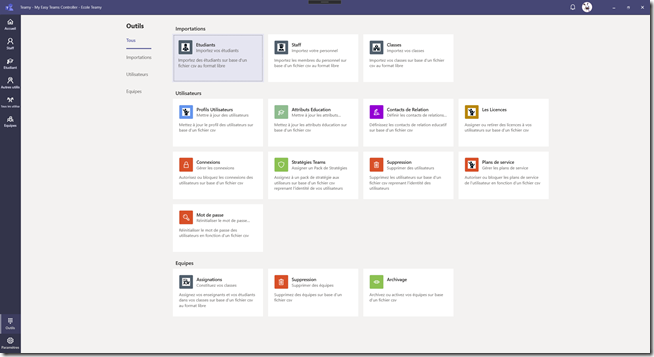
In the "Tools" screen you will find the "Students" tool in the "Import" section
The import of user accounts of type "Students" is done on the basis of a CSV file.
The format of the csv is free, you can name your columns as you see fit, and the order of the columns has no impact.
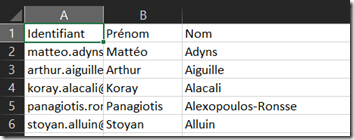
Example of a minimum CSV file
The format of this file is free but it must contain at least three columns representing the following information:
- Identity of the user, his UserPrincipalName (UPN), his login on your environment: arnaud@ecole.be for example. It's up to you to define all these identifiers, but be careful this identifier must respect some rules.
- Student's name: Last name
- First name: His first name
Microsoft 365 ID policies
- No space, no blank in identifiers
- No specific characters such as accents and others
- The domain name, @ecole.be must exist on your Microsoft 365 environment
- Each identifier must be unique
Import a minimum csv file
The csv source file must be closed for the Teamy application to open it.
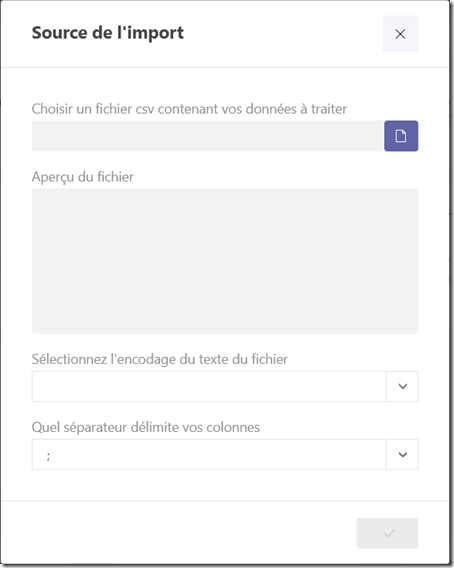
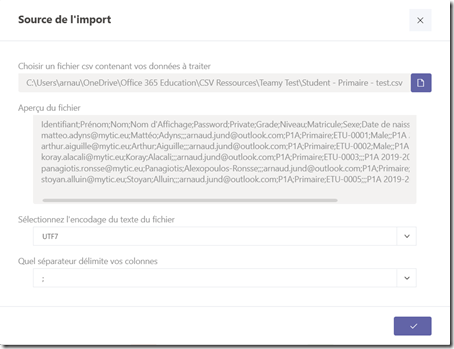
I select my CSV import file
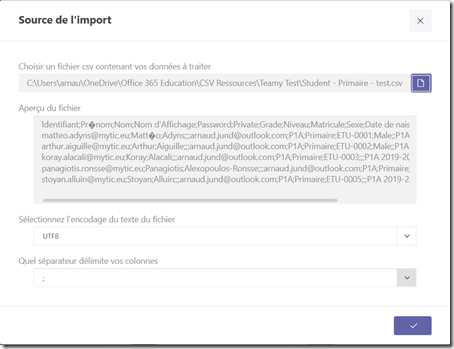
Teamy gives me an overview of the content, and here I can see that some characters like accents are not loaded properly. This is related to the encoding format of my csv file. The most standard standard is UTF8, but here it is not suitable.
By selecting another encoding format, such as UTF7, we can see that the problem of accents disappears
The default column separator in CSV is the semicolon character, but it could be the comma.
You can adapt the separator.
Column mapping
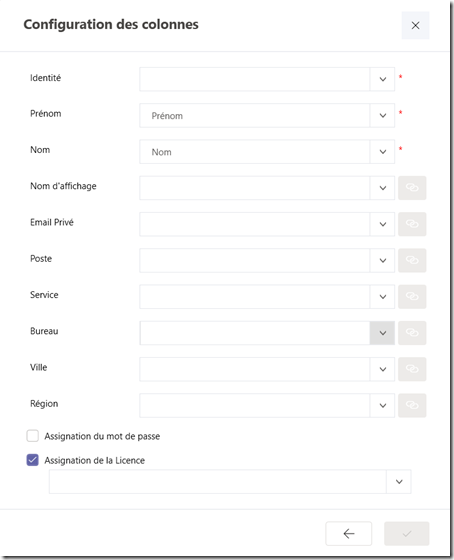
Teamy will try to find matching columns, for mandatory columns, between the expected information and what is in the csv file I use.
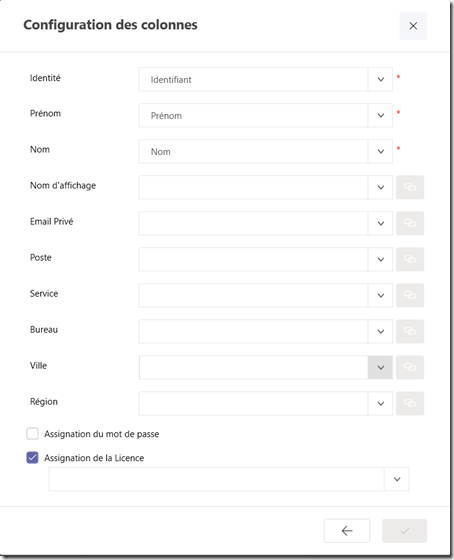
It did not find a matching column for the identity of the users to import. It's up to me to do the junction manually.
For the "Display name" attribute, I do not have a match in my csv, Teamy will automatically compose the value by concatenating the user's first and last name.
For other attributes, Teamy will not update them because no match is made.
Options:
- Password Assignment: Allows you to define a csv column for assigning a password. Without this assignment, the password will be automatically generated randomly for each imported user
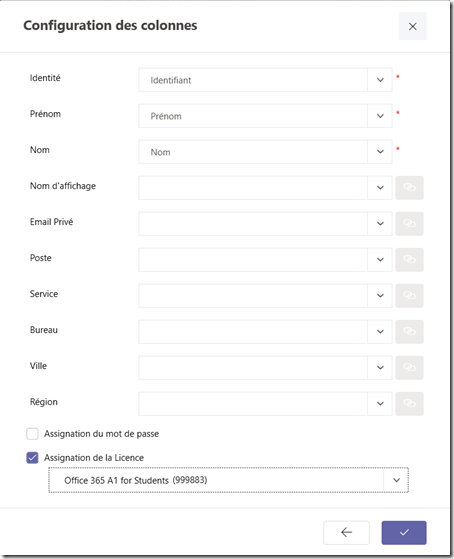
- License assignment: You import students, Teamy waits for you to select a student license
As long as the column mappings, or options are not done correctly, the button to perform the import remains grayed out. If everything is correct, only then it appears
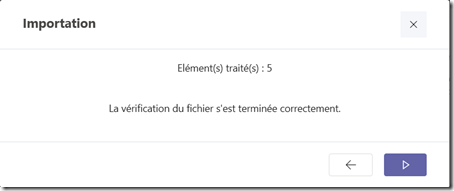
Before performing the import, Teamy will make a final check on your import data.
Here, it didn't detect any errors, no alerts. The import will be able to be carried out correctly a priori.
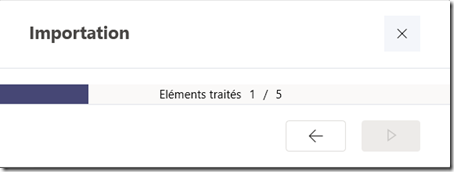
The import is in progress, you can follow the progress, where decide to close this window, the import will continue in silent mode.
Example of a complete CSV file
My CSV file includes 5 notions (school), Class, Level, School, Building and Student Number of the student. A Microsoft 365 user profile does not offer this type of information. But there are standard attributes that can be exploited to save this school information.
These attributes are
- post
- Service
- Office
- City
- Region
It's up to you to define which attribute represents what in your school data.
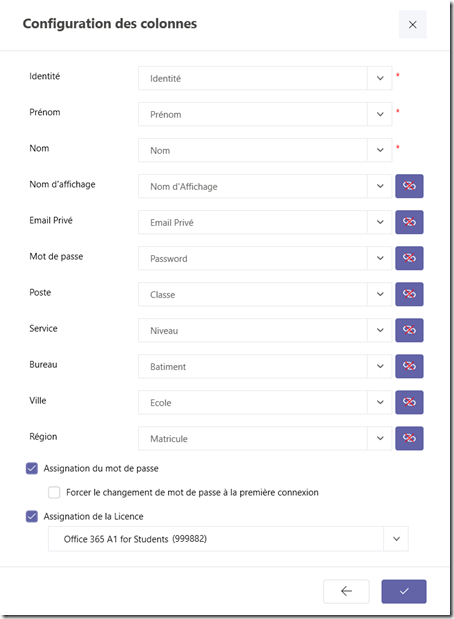
Here I make this choice
Position = Class
Service = Level
Office = Building
City = School
Region = Matricule
My csv file also includes the following elements:
- Display name, because I want to assign the display name to my users myself
- Password, because I want to assign passwords to my users myself
- Email Private, because I want to assign a private email address to my users
At the time of import, my column mapping screen will give this
If an association between the expected data and the column is not good, you can unlink it!
After import, here is the result
Import result
After each import, a result csv file is generated on your workstation. The latter is located in
C:UsersarnauDocumentsTeamy<compte scolaire="">Imports
My minimum import will give this

Automatically generated passwords are therefore recoverable in this file
My full import will give this</compte>

Errors
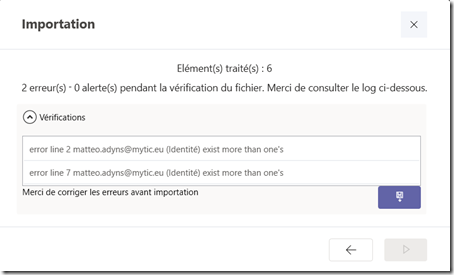
When importing, Teamy performs a verification of your data. Here are some examples of errors
Here my csv file contains a duplicate on the identities of the users to import.
We cancel the import, and we correct the CSV file on lines 2 and 7 to remove the duplicate.
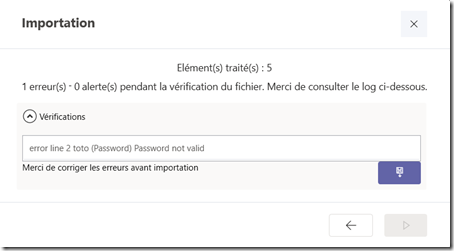
Here I tried to import by assigning the passwords myself. It detected in line 2, that the password to be assigned does not comply with the requirements of Microsoft 365
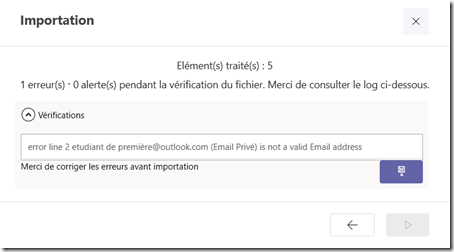
Here I tried to import by assigning my users a private email address. He detected in line 2 that the private email address is not syntactically correct
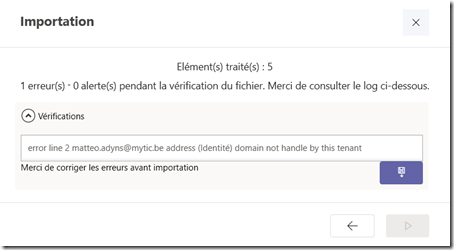
Here during the import, it detected that in online 2, the domain used for the user's identity is not compliant.
mytic.be is not a domain registered on my Microsoft 365 tenant

